


In this post we will begin to decorate a Christmas tree. Lets have a look at all the goodies.
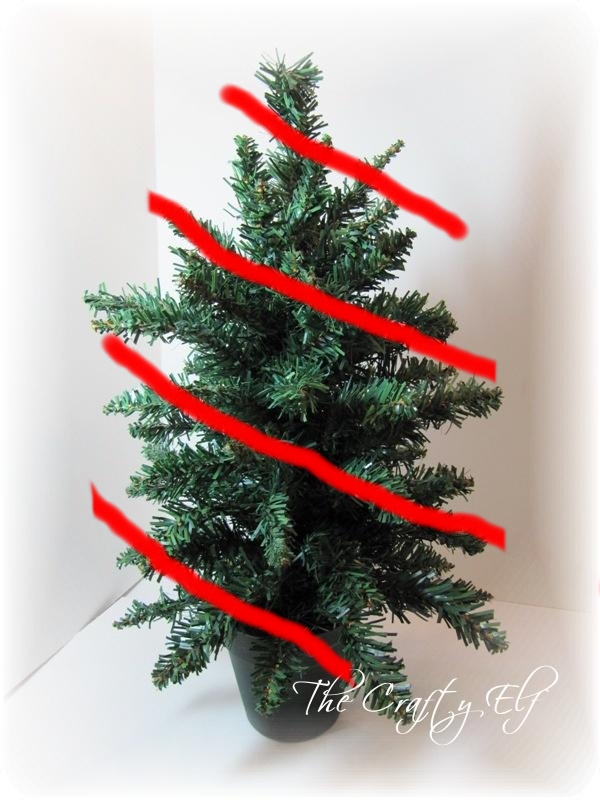
 First, we have our 18" Christmas tree.

And here are all the goodies going on the tree. Previous posts explain in detail how all these tree ornaments were prepared.
Let's begin!

I'm going to start with my largest pieces first. The largest pieces from all the ornaments are the candle ring pieces. I've taken all the pieces and separated them into two piles, the poinsettias and the greenery. I also cut several wires so I'm ready to go.

Here are the 10 poinsettias. There will be four used on the front, four on the back and one on each side of the tree

And here are the 10 pieces of greenery. I'll also use four on the front, four on the back and one on each of the sides

I'm going to begin with the greenery.

I will place the first piece of greenery at the top of the tree and work from there. I like to follow a pattern when decorating and I like to work from left to right. No matter where you are working on the tree, follow the pattern. It will become more obvious as the tree is decorated.

This is an idea of the pattern

You can see above that the piece of the candle ring base is still attached to the greenery. This allows me to add the wire to something other than the greenery itself

I'm placing the greenery right into the tree.

Here you can see the wire placed around the candle ring piece as well as the branch of the tree. I'll twist the wire tight to secure and then fold the ends of the wire tight along the branch so they are not sticking out. This avoids injury as I continue to decorate the tree. Once the wire is secured tightly I will then carefully adjust the greenery.

Perfect!

Remembering the pattern, I place my second piece of greenery

This side is now finished

I'll now begin on the back of the tree


Following the same pattern, the back of the tree is now done

I need to balance the tree out so on the left side of the tree I will place one of the remaining two pieces of greenery at the bottom where you see my hand

On the right side of the tree you can see it needs the final piece of greenery right there in the middle

As I turn the tree you can see the pattern has been kept all around and it looks perfectly balanced.

I will now begin placing the poinsettias using the same pattern.

To help explain where the poinsettias will go, I have drawn yellow lines around the greenery. I don't want to place my poinsettias on top of the greenery so I will work around them. Following my pattern, I have placed purple dots to show where I will attach them.
I begin with the first poinsettia

Adding the second one, notice how far in the tree I am placing it? This is important as it adds dimension to the tree. If you only place ornaments along the outside branches of the tree it becomes flat looking. There is an entire tree to decorate so use it all. You will notice during this entire process I will have nothing placed on the end of any branch!!

Once I have wired the poinsettia on the tree I can gently adjust it to where I want it to go

Having left all the stems attached, I will now cut off what I don't need

I will add the wire around the bottom of the poinsettia

The front is now done

Starting at the top on the back, I place the first poinsettia right into the tree and I'm going to turn the stem facing down as shown

Pulling the wire gently but firmly so the poinsettia rests along side of the branch, I secure it in place


Bottom left branch is the spot for the second to last poinsettia

The middle of the tree on the right side for the last poinsettia
I've now finished placing all the greenery and poinsettias on and I think its coming together quite nicely, don't you? Next post will be the gold glittery stems. Can't wait!
Wherever you are in your day, I hope you're enjoying it.
Wishing you many wonderful creations!


And here are all the goodies going on the tree. Previous posts explain in detail how all these tree ornaments were prepared.
Let's begin!

I'm going to start with my largest pieces first. The largest pieces from all the ornaments are the candle ring pieces. I've taken all the pieces and separated them into two piles, the poinsettias and the greenery. I also cut several wires so I'm ready to go.

Here are the 10 poinsettias. There will be four used on the front, four on the back and one on each side of the tree

And here are the 10 pieces of greenery. I'll also use four on the front, four on the back and one on each of the sides

I'm going to begin with the greenery.

I will place the first piece of greenery at the top of the tree and work from there. I like to follow a pattern when decorating and I like to work from left to right. No matter where you are working on the tree, follow the pattern. It will become more obvious as the tree is decorated.
This is an idea of the pattern
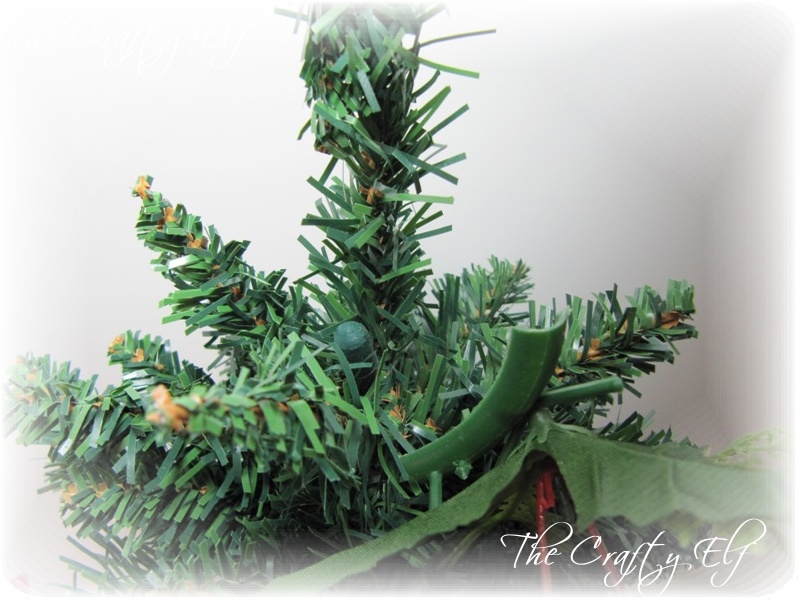
You can see above that the piece of the candle ring base is still attached to the greenery. This allows me to add the wire to something other than the greenery itself

I'm placing the greenery right into the tree.

Here you can see the wire placed around the candle ring piece as well as the branch of the tree. I'll twist the wire tight to secure and then fold the ends of the wire tight along the branch so they are not sticking out. This avoids injury as I continue to decorate the tree. Once the wire is secured tightly I will then carefully adjust the greenery.

Perfect!

Remembering the pattern, I place my second piece of greenery

This side is now finished

I'll now begin on the back of the tree

I will attach my first piece in the same spot as I placed the first piece on the front. You will notice if you look carefully, that the very first piece of greenery I placed at the top of the front of the tree is on the opposite side of the back piece. That is what I want.

Following the same pattern, the back of the tree is now done

I need to balance the tree out so on the left side of the tree I will place one of the remaining two pieces of greenery at the bottom where you see my hand

On the right side of the tree you can see it needs the final piece of greenery right there in the middle

As I turn the tree you can see the pattern has been kept all around and it looks perfectly balanced.

I will now begin placing the poinsettias using the same pattern.

To help explain where the poinsettias will go, I have drawn yellow lines around the greenery. I don't want to place my poinsettias on top of the greenery so I will work around them. Following my pattern, I have placed purple dots to show where I will attach them.
I begin with the first poinsettia

Adding the second one, notice how far in the tree I am placing it? This is important as it adds dimension to the tree. If you only place ornaments along the outside branches of the tree it becomes flat looking. There is an entire tree to decorate so use it all. You will notice during this entire process I will have nothing placed on the end of any branch!!

Once I have wired the poinsettia on the tree I can gently adjust it to where I want it to go

Having left all the stems attached, I will now cut off what I don't need

I will add the wire around the bottom of the poinsettia

The front is now done

Starting at the top on the back, I place the first poinsettia right into the tree and I'm going to turn the stem facing down as shown

Pulling the wire gently but firmly so the poinsettia rests along side of the branch, I secure it in place

Adding the rest of the poinsettias, I am now finished the back and will add the final two poinsettias as I did with the greenery

Bottom left branch is the spot for the second to last poinsettia

The middle of the tree on the right side for the last poinsettia
I've now finished placing all the greenery and poinsettias on and I think its coming together quite nicely, don't you? Next post will be the gold glittery stems. Can't wait!
Wherever you are in your day, I hope you're enjoying it.
Wishing you many wonderful creations!


Whoop, whoop! Beginning to come together - I love it :)) And the weekend has begun too! Di xxx
ReplyDelete