


You can't have a Christmas tree without a little bit of glitter!

See those gold glittery stems? They're next!


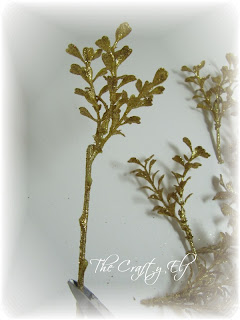
Here we have three lovely gold glittery stems. I'm sorry about the colour, my camera has not done these beauties any justice!!


See those gold glittery stems? They're next!

People have asked me if you can even take these apart. Yes, you can! I'll show you how.

Here we have three lovely gold glittery stems. I'm sorry about the colour, my camera has not done these beauties any justice!!

I begin with the first stem.

Carefully remove all the tags.

I find that these stems work best if you begin at the bottom and snip upwards. It allows you to see what's available to cut - better, I think. Remember to cut as much as possible. Check twice, cut once! I like to get as close to the main stem as possible.

There we have our first cut and (new) little stem for our tree.

Working my way up the branch I'm cutting each piece as close to the stem as possible, I've now
reached the top.

With the top piece still attached to the main stem of the gold glittery branch, I'm going to cut an additional few inches extra down along the stem. This will allow me to use this piece for the top of the tree which I will show later.

I'm done the first branch. I've now got several glittery pieces to work with and two more branches to go.

Cutting the second branch up as I did the first, I'm now at the top.

Here is the tip of the second branch. Remembering to add those few
extra inches ......

...I cut the top off the branch down along the stem.

The third and final branch is cut and again, I leave a few inches of the stem attached for the top.

This is now all the new little glittery stems we have to work with.

I've gone from three branches to all these wonderful little pieces. They're going to be awesome, I can't
wait to use them and show you.
Here is what we have ready so far.

The 18" tree

Poinsettia candle rings all cut and ready (see previous post for details)
The gold glittery little branches
I'm well on my way to having what I need ready to get started. There's just a few more things to go. Wait until you see what's next!
Wherever you are in your day, I hope you are enjoying it.
Wishing you many wonderful creations.


Hi Crafty Elf,
ReplyDeleteCan't wait to see what's next!
Enjoy your day
Jo x
P.S i have candy!
The ingredients are all coming together.
ReplyDeleteToni xx
Looking good - although it's very busy here I'll be hopping in to check progress :)) Di xx
ReplyDelete