Blogger Layouts
`Norman Wesley Brooks, “Let Every Day Be Christmas”

E-mail The Crafty Elf

TheCraftyElf@hotmail.com

Saturday, October 29, 2011

Note Cards ....

...or tags, with a message inside.

I thought I would try making a couple of fun note cards/tags to see how they turn out.  If you've got a stash of buttons then these note cards/tags might be something for you.  I used my Martha Stewart button and embossing punch but now I might just be shopping for some really interesting looking buttons instead.  I'll call these my prototypes.

Here is what I used for todays project, pretty simple.


Stampin Up Real Red and Crumb Cake cardstock
Jute Packaging Twine
Martha Stewart Button and Embossing Punch

Here are the note cards/tags


I thought they turned out pretty nice but I've got bigger plans now.  Using some of these note cards/tags for Christmas gifts, I think they'll be perfect!  I've purchased some kraft wrapping paper for this years gifts and I like to use old greenery pieces, pine cones, berries and whatever else I have to embellish.  I take them apart and attach the little pieces to gifts.  I can see a few of them finding their way to these note cards/tags too, can't you just picture it?

I'll put these note cards/tags aside for a week till I bring out the Christmas decorations, sort them and decorate.  Ya...I'm one of those, sorry!  I like to get them up and enjoy them for a couple of months.  Having worked in a Christmas store for all those years, we decorated in August so November seems late to me.  It's really whatever works for you.  Everyone has their own traditions and I have to admit that is the one thing I love about Christmas.  I love to hear what people remember most about their holidays and the traditions they follow today, if any.  Some old traditions and some new....these all get passed on for generations, it really is quite interesting!

I'm really getting exicted, not going to lie!

Wherever you are in your day, I hope you're enjoying it.
Wishing you many wonderful creations.

Photobucket

Thursday, October 27, 2011

Wrapped And Ready To Go

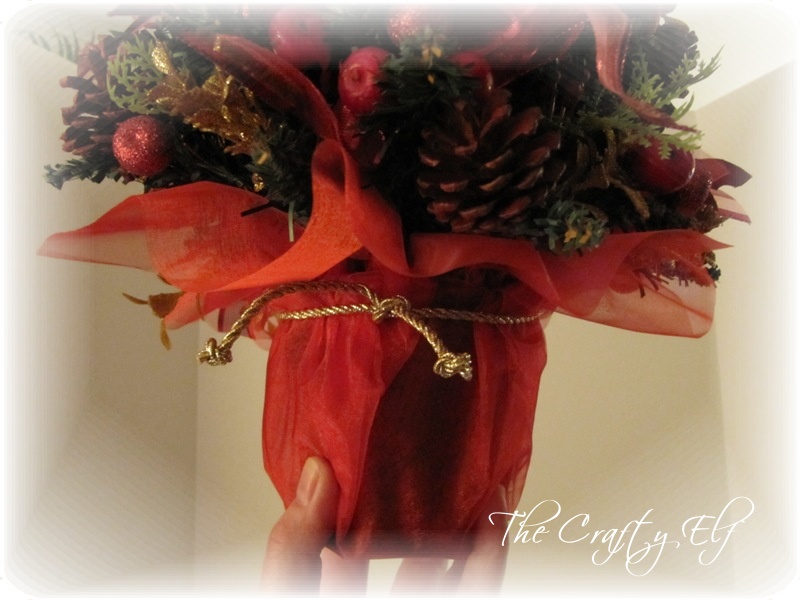
I've got my gorgeous little tree all wrapped and ready to go.  I'm donating it to an event that will be held Friday to raise much needed funds for a local Hospice.


I'm sad to see it go but I know it will find a wonderful new home and bring joy this Holiday Season!

Wherever you are in your day, I hope you're enjoying it.
Wishing you many wonderful creations!


Photobucket

Wednesday, October 26, 2011

My Dollar Store Christmas Tree

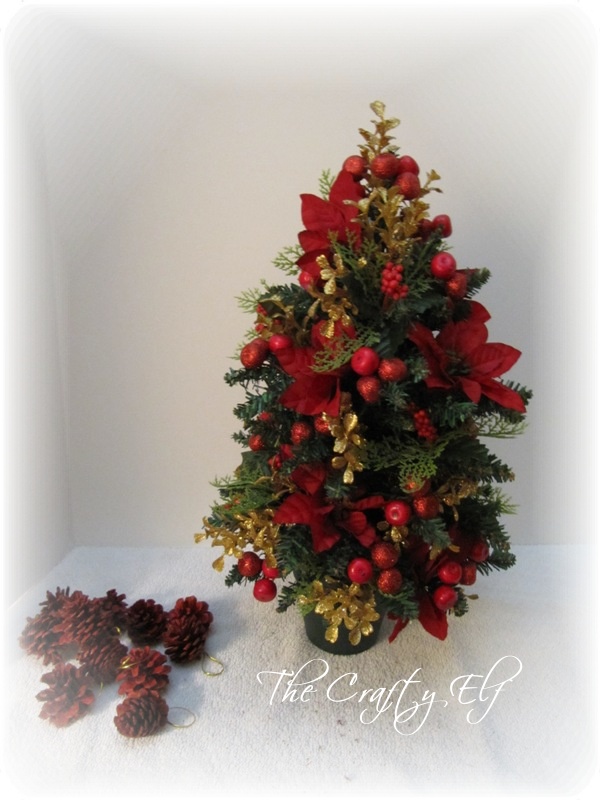
I can't believe how my little dollar store has transformed into a gorgeous Christmas tree!

I want to share with everyone how I finished the base of tree which began as a 4" green plastic flower pot


Here is the pot I'm going to cover


I purchased this gift wrap fabric from the dollar store and I'm also showing the cord I'm going to add at the very end


I open the fabric and cut it in half.  I place the first piece down as shown


I place the second piece on top in the opposite direction


I place the tree in the middle of the fabric


I begin to tuck the fabric into the top of the plastic flower pot as shown


I continue to tuck the fabric in all the way around the entire pot


Tucking


Once it is all tucked in I add the cord and tie it tightly around the pot.  I've knotted the ends of the cord so it doesn't fray.  Now the base of the tree is stunning!


Here is the finished tree with the covered base.  I will just tuck the fabric in a little more so the end of the fabric is in line with the bottom branches of the tree. 

Is that not a fantastic tree? 


Before


After!


What a transformation!!


Here is a breakdown of the cost

Tree                                                                                 $2.00

2 candle rings at $1.00 each                                           $2.00

Gold glittery branches 3 at $1.00 each                            $3.00

2 bags of Cherries at $1.00 each                                     $2.00

1 bag of pine cones                                                         $1.00

Fabric Gift Wrap                                                             $1.25

Wire used a portion of the $0.87                                    $0.15

Gold cording-used a portion of the $2.00                      $0.45

Ribbon-only used a portion of the 50 yards at $7.96    $0.75 


                                                                                    $12.60  
 (plus my time)

I hope this tree has inspired many to create something wonderful this Holiday Season.
If you have any questions please don't hesitate to contact me at TheCraftyElf@hotmail.com

 
Wherever you are in your day, I hope you are enjoying it.
Wishing you many wonderful creations!


Photobucket

Tuesday, October 25, 2011

And Then There Was Ribbon!

Time for the ribbon!  Some people were wondering about the ribbon.  Where was it going to go?  Did it even need the ribbon?  What, ribbon?  Yes, yes and absolutely yes!

I think after looking at this post you will see how the ribbon not only adds to the tree but how it gives the tree that extra bit of shape it needed.

What I'm going to share first is the bow for the top part of the tree.  Because this is a very small tree I will need to adjust the size of the bows to accommodate. 

I will being with a three looped bow.


I'll make my first loop holding the ribbon where I want the first loop to be.  You will see about 4" of ribbon for the first tail of the bow


Pinch the ribbon where the first loop will be and then twist the ribbon (the piece that is touching the pointer finger or, looking at the loop, the bottom piece of ribbon) clockwise so the top of the twisted piece of ribbon is now facing you.  Before the twist the top of the ribbon (or good side of the ribbon) would have been facing out.


I will make a second loop


Twist the ribbon again.  By twisting the ribbon you will always have the right side of the ribbon facing out.


I will make the third and final loop...... and twist


Taking a piece of wire approximately 4" long,  I will carefully slide it under my thumb and on top of the ribbon/bow.  I will bend the wire to the back and twist it to secure


I will cut the ribbon so that the second tail is slightly longer than the first.


Here is my bow


I will adjust the ribbon so that the tails are facing the front and the loops are where I want them to be


Following the pattern, I will place the bow at the top of the tree


It is important to place the bow right into to the tree. 


Now that the bow is where I want it, it is secured by a wire


I will use carefully adjust the tails of the bow to add shape to the tree. 


Here you will see the bow has been placed so that it adds dimension, shape and that extra element to the tree


For the other bows on the tree I will add a one looped bow.  I will make it exactly as I did the first only this time, using one loop


I make the loop and secure with the wire as I did the bow above


Here you can see the bow is secured by the wire


I will cut the tail just slightly longer than the first


I will also twist the last tail cut so that the right side of the ribbon is facing up.  I will continue adding these bows to the tree following the pattern


Here you can see how I have added the bow and how I use the tails and loop itself to add shape to the tree.  It is important to remember to place that bow into the tree.  By that I mean 2 to 3 inches in from the end of the branch.  You will also notice how the one looped bow creates the appearance of a regular bow although it only has one loop.  This style of bow is perfect for smaller projects


Backing the picture up a bit, you can see how it adds shape and fits right into the tree perfectly


 I will continue to add the remainder of the bows


I have finished adding all the bows to the front of the tree


Moving to the back of the tree, I begin at the top and continue adding the bows and following the pattern


So here is the tree all decorated.  It's time now to add the finishing touches on the bottom. 

Wherever you are in you day I hope you are enjoying it
Wishing you many wonderful creations!


Photobucket

Sunday, October 23, 2011

Trimming The Tree

After this post only a couple things left to go!!

I'll be starting with the gold glittery branches


As mentioned in my previous post I'll be following a pattern, I will continue to do so with all the remaining ornaments.  Having said that, do you remember the long gold glittery stem I cut?  I'm going to use it now at the top of the tree.  You can't ignore the top of the tree so here is where I begin to add some of the goodies.


I begin by sliding the long stem down into the tree keeping it close to the top branch.  The top branch I'm referring to is the one that sticks straight up to the sky.


I continue to slide the stem down until I have it as far down as needed. 


I then carefully place it up against the top branch and secure it with a wire.


I will now continue to add the remaining gold glittery branches to the rest of the tree.


One by one I will follow the pattern


Now that I've got all the branches attached to the tree


I will begin with the cherries.  Remember the group of five?  I'll start off with that one.

Can't ignore the top of the tree so that is exactly where I will put the group of five.  I'm really pleased with how this is all coming together.


Again, following the pattern, I continue to add the remaining groups of cherries.


Turning the tree, I will make sure the back and the sides are all covered and I haven't missed any spots.  It's always good to turn your project as your working to make sure you have everything evenly placed.  I know I keep repeating myself but if you follow the pattern I promise you will never go wrong.


Now that I've got the entire tree covered and all the cherries have been attached, I will put the final ornaments on.


The pine cones.


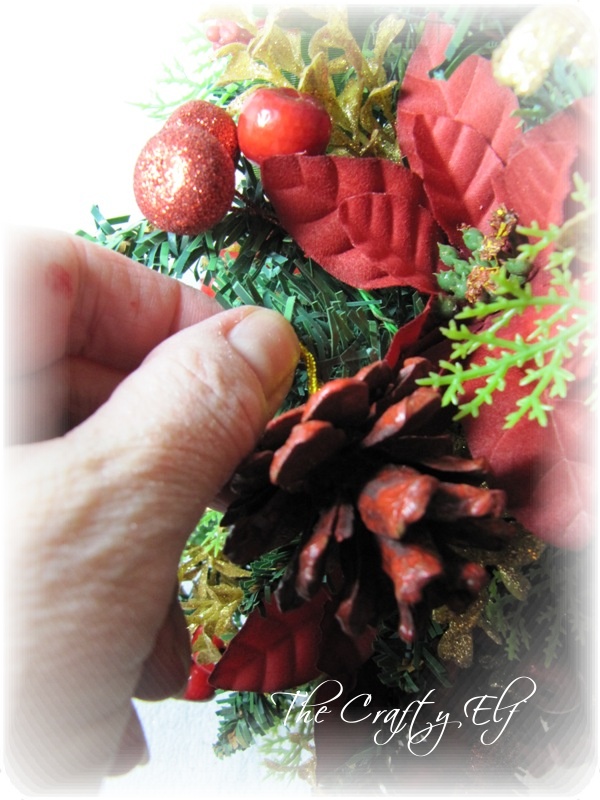
Today I want to show you how to add an ornament to your tree.  The type of ornament that has a string or cord loop attached to it.  Some people like to hang the ornament on the tree as it is, hanging it only by the loop but I have another way.  Looking at the picture above, can you see how I have hung the ornament on the branch?  It's just slightly over an inch - in from the end.


I will now place my thumb over the loop and holding the loop and the branch together making sure that the loop on the branch doesn't move


I begin to wrap the ornament around the branch clockwise while continuing to hold the loop in place.


Wrapping clockwise


When the ornament is tight against the branch, I continue to carefully turn it (if need be) so that the ornament ends up stitting on top of the branch. 


See how nicely that sits there?  Notice as well, you still see the end of the branch?  That's important to keep in mind.  You don't want anything sitting on or at the end of any branch!


I will add the second pine cone holding the loop and wrapping the ornament clockwise.


Around and around


I continue to add all the pine cones and here is the last one


All done


All that's left to do now is to add the ribbon and finish off the bottom of the tree and then I'm done!  I can't wait to show you the finished tree!

Wherever you are in your day, I hope your enjoying it.
Wishing you many wonderful creations!

Photobucket